How to Loop a PowerPoint
A self-running or looping PowerPoint presentation can be great for using in booths at conferences, displaying information on screens before a live event/presentation, or even to use in the waiting room of a business to showcase information.
The great thing is that if you can create a PowerPoint presentation, saving it for a looped playback is a breeze.
You can loop a PowerPoint in two different ways depending on playback method – as a PowerPoint or as a video file.
Here’s how you do it.
2 Million+ PowerPoint Templates, Themes, Graphics + More
Download thousands of PowerPoint templates, and many other design elements, with a monthly Envato Elements membership. It starts at $16 per month, and gives you unlimited access to a growing library of over 2,000,000 presentation templates, fonts, photos, graphics, and more.
Create a Loop in PowerPoint

Design your PowerPoint presentation to suit your content. You can loop any number of slides for playback, so don’t worry about a limitation here.
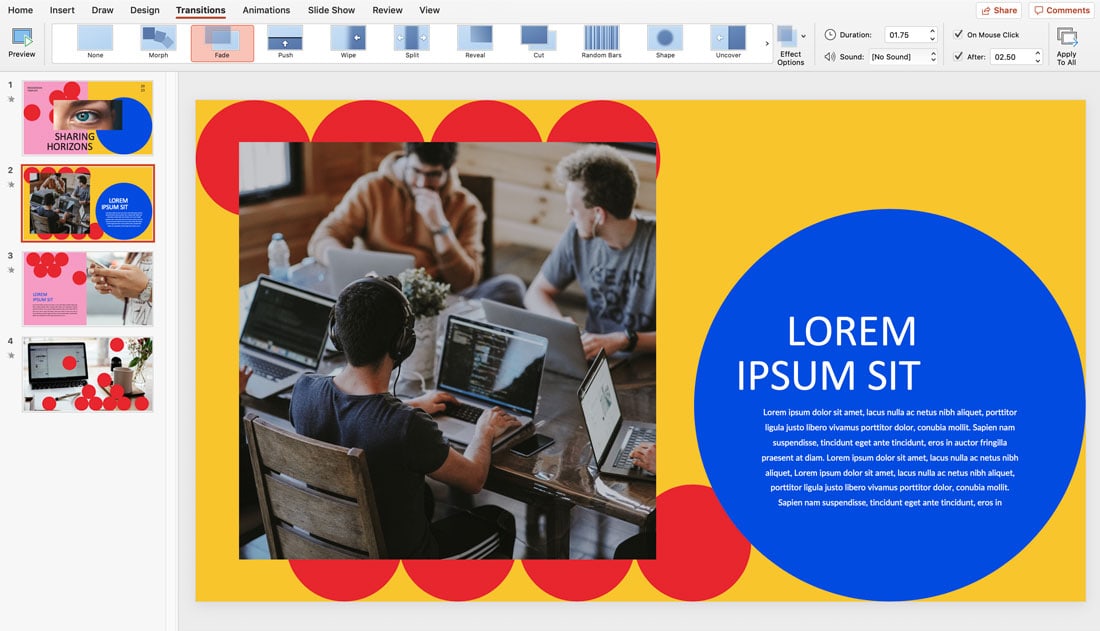
If you want specific types of transitions between slides, remember to apply them to each slide. You can also select all apply the same transition to each slide or apply the transition to one slide and then “Apply to All” using the checkbox in the toolbar.
Slide transitions are located in the Transitions menu.
With a loop presentation, you need to determine how long each slide will linger on the screen. It might be the same amount of time for each slide or can vary.
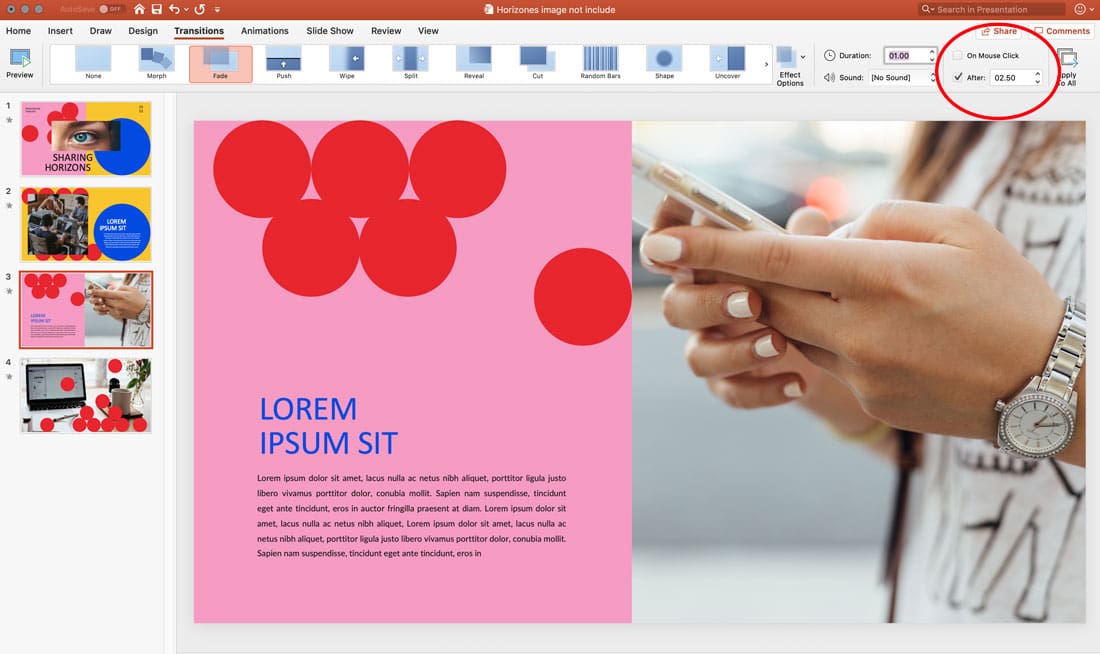
You can set this timing in the Transitions menu as well.

Uncheck the “On Mouse Click” button and set timing for slides in the “After” box.
Preview transitions and timings in Slide Slow mode to ensure that each slide stays on the screen long enough to be clearly understood. Slides with more text need to stay on the screen longer so that they can be read easily.
When in doubt, err on the slide of leaving a little more time than you think is necessary to ensure that all presentation viewers have time to digest information on the screen.
Save for PowerPoint Playback

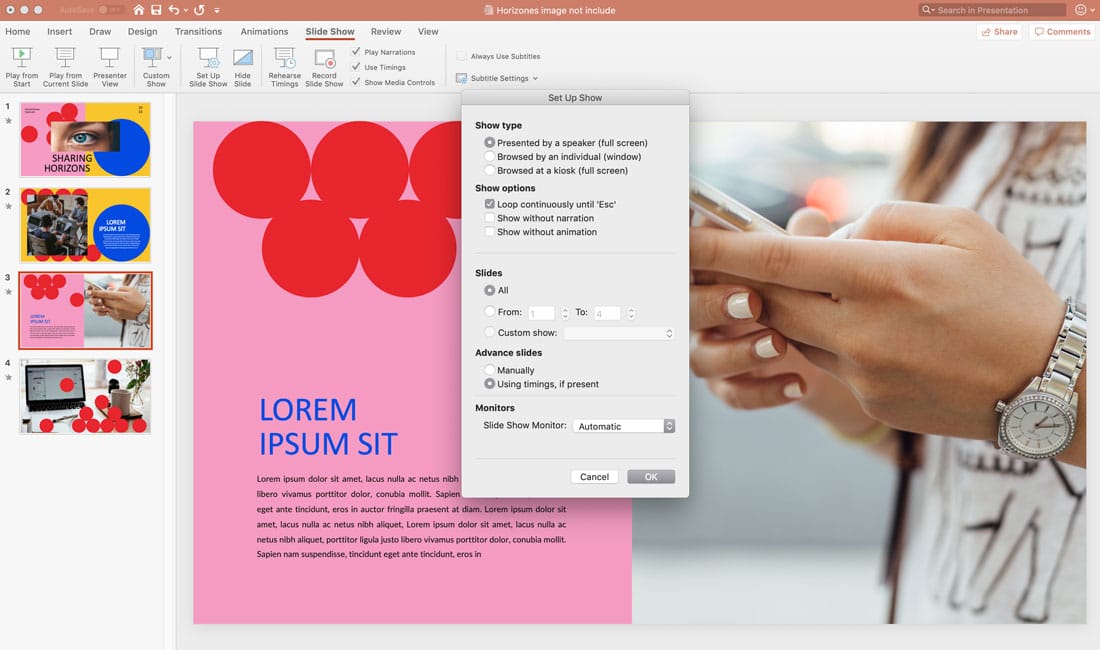
If you plan to play the looped PowerPoint in a native file format, such as on a computer in PowerPoint, you want to set up the slide show loop in the Slide Show tab.
Click Set Up Slide Show, then make sure Loop Continuously Until ESC and Using Timings are checked. This will set the presentation to play in a loop with the timings you set in the previous step.
Click OK.
To play the presentation just go back to the Slide Show tab and Click Play from Start. It will run until you tap the ESC key.
Top Tip: You need to turn off screensavers or power save functions or they can kick in and override the presentation.
Save for Video Playback

The other option for playing a looped PowerPoint is to save the file in a video format. This is recommended if you plan to play it back on multiple screens, want to transport the file on a flash drive, or save to a website for easy viewing.
Once you have finished the design and set transitions and timing as in the step above, you can export the presentation to a video format.
Click File > Export. Select a video file format (MP4 or MOV). Choose a file name and location to save. Select an export quality – presentation, internet, or low quality. (This impacts file size and playback resolution.)
Make sure the timing box is selected to use your recorded timings and narrations and save.
When you open the file for playback, select the loop playback option in your video player to ensure the presentation will play continuously.
Conclusion
There are plenty of practical applications for playing a PowerPoint presentation in a loop. The key to making this work effectively is ensuring that each slide is on the screen long enough for each person to understand and exporting to a file type that will work in your presentation environment.
Don’t forget to take a look at our full PowerPoint templates guide, or our collection of the best PowerPoint templates for your next project!


