How to Insert a Text Box in Google Docs
Text boxes can significantly enhance the functionality and design of your documents in Google Docs by allowing you to highlight information, create callouts, or visually separate text from the main content.
While Google Docs does not have a direct method to insert traditional text boxes as seen in other word processors, you can achieve a similar effect using the Drawing tool or tables.
In this quick guide, we will walk you through each method and provide detailed tips to maximize the effectiveness of text boxes in your documents. Let’s get started.
2 Million+ Digital Assets, With Unlimited Downloads
Get unlimited downloads of 2 million+ design resources, themes, templates, photos, graphics and more. Envato Elements starts at $16 per month, and is the best creative subscription we've ever seen.
How to Add a Text Box in Google Docs Using the Drawing Tool
The Drawing tool in Google Docs is a versatile feature for adding graphics, shapes, and text boxes.
Step 1: Open the Drawing Tool
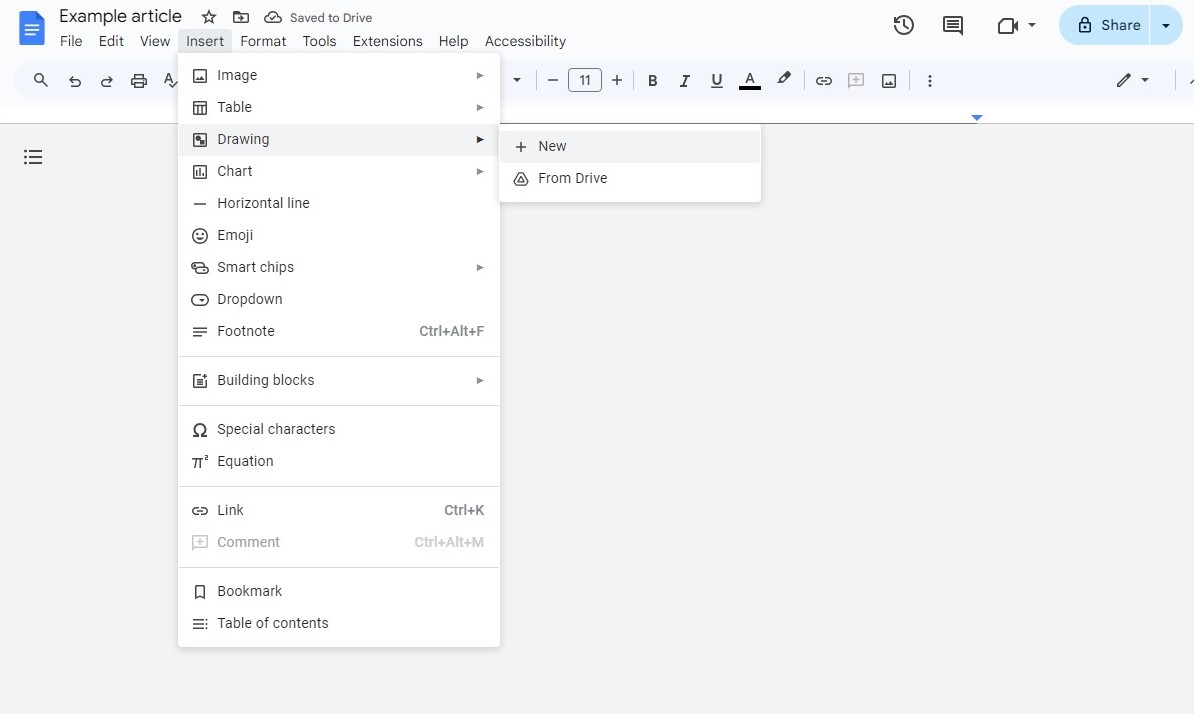
To access the Drawing tool, click on the “Insert” menu in the toolbar at the top of your Google Docs interface. Select “Drawing” from the dropdown menu and then click on “New.” This will open a new drawing canvas.
Step 2: Insert a Text Box
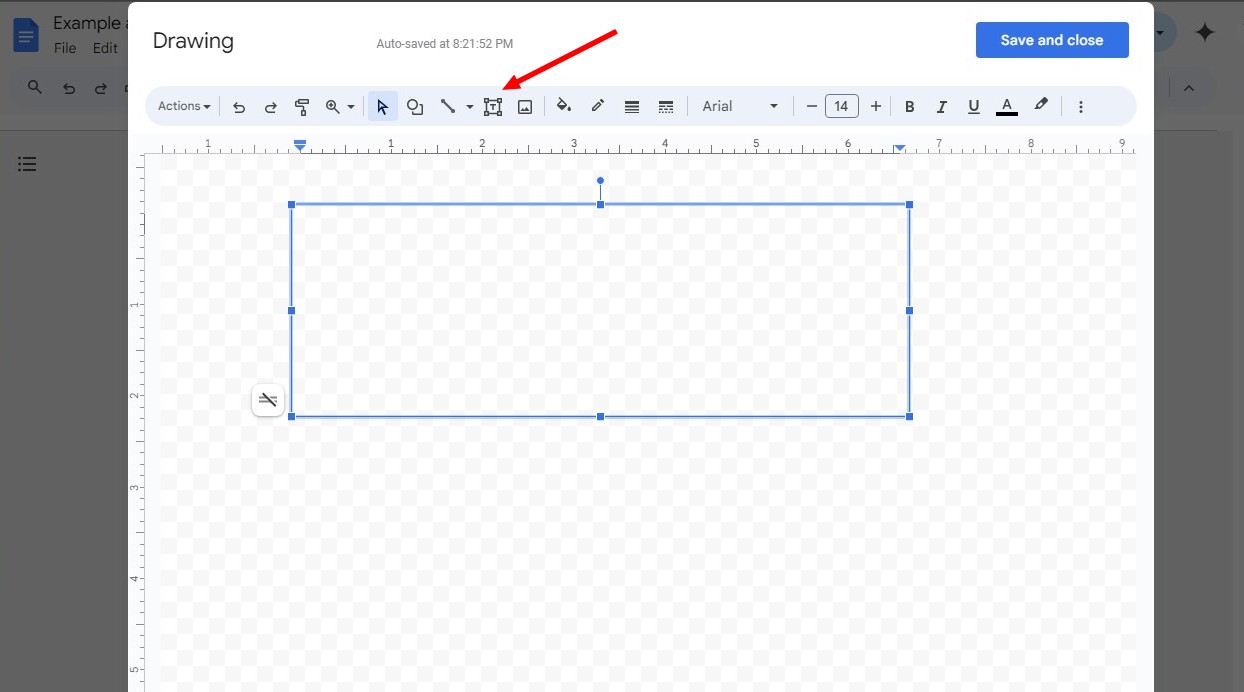
Inside the drawing interface, you’ll find the text box icon, which looks like a “T” inside a square. Click this icon, then click and drag on the canvas to create a text box of your desired size.
Step 3: Enter and Format Your Text
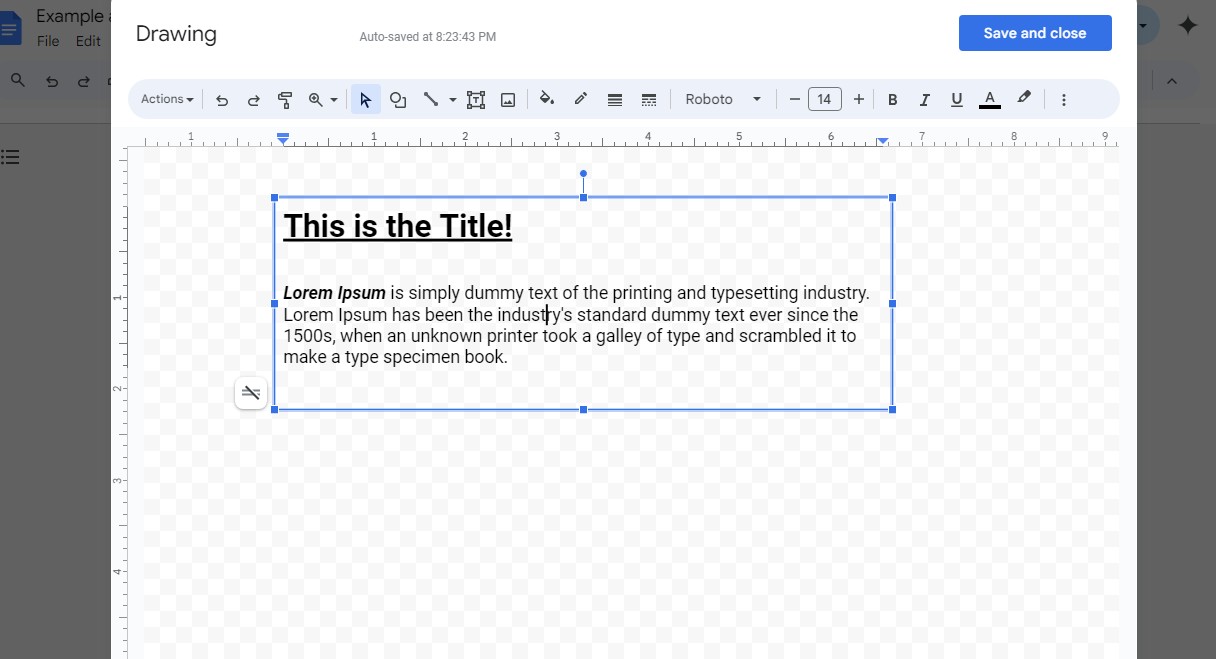
Click inside the text box you just created and type your text. You can use the toolbar within the Drawing tool to change the font, size, color, and alignment of your text. This toolbar provides options to bold, italicize, and underline your text as well.
Step 4: Save and Close
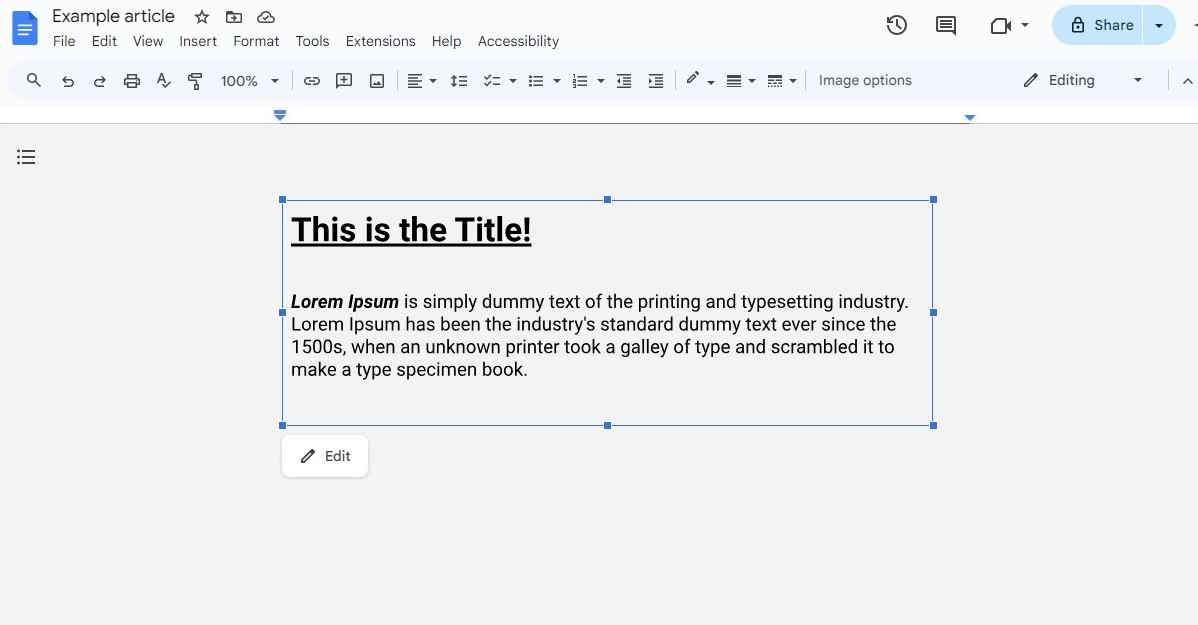
Once you have formatted your text to your liking, click the “Save and Close” button to insert the text box into your main document. You can move and resize this text box just like any other image.
How to Insert a Text Box in Google Docs Using Tables
Another method to simulate a text box effect is by using a single-cell table, which provides more text control and is easier to integrate into flowing text.
Step 1: Insert a Table
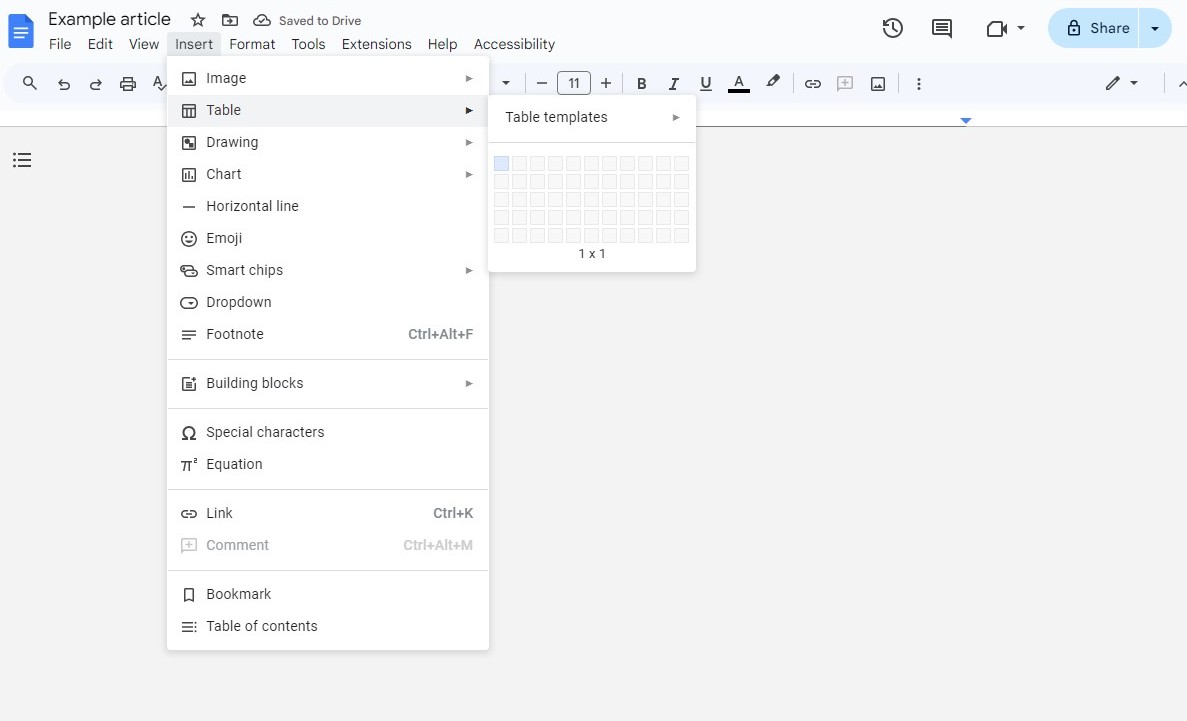
Click “Insert” from the top menu, then “Table,” and drag to select one cell. Place this single-cell table where you want your text box to appear.
Step 2: Customize the Table
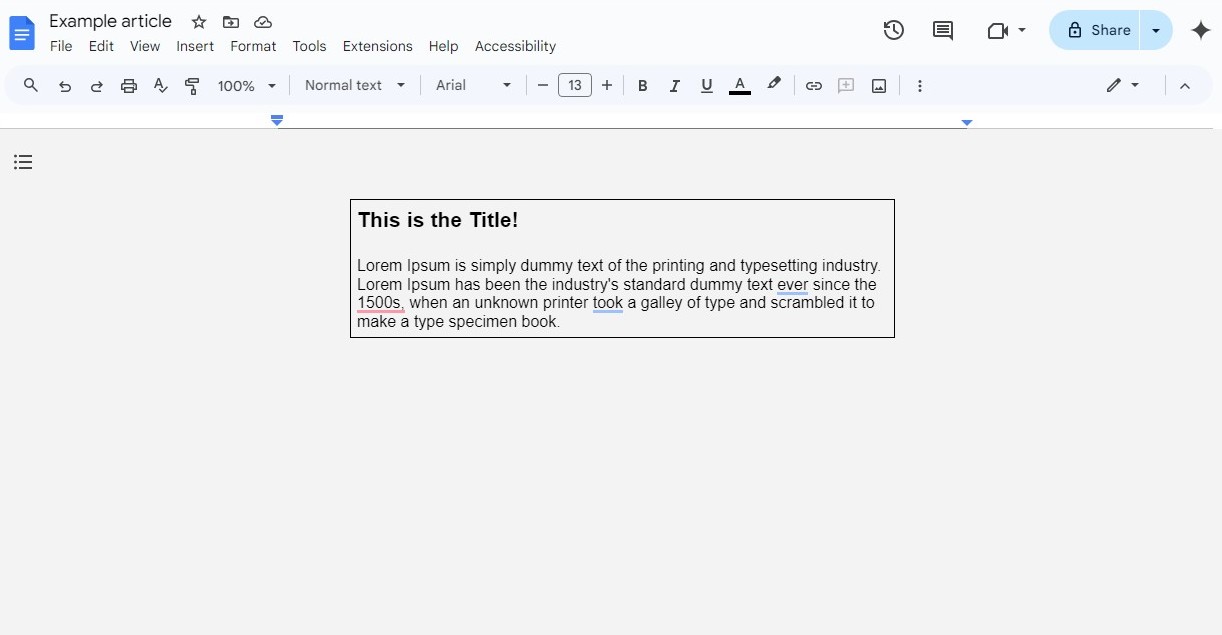
Type your text into the cell. You can adjust the size of this cell by dragging its borders. To make it stand out like a text box, change the cell’s background color, adjust the border thickness, or even make the border invisible under “Table properties.”
Step 3: Format Your Text
Just like any other text in Google Docs, you can format the text inside your table using the standard text formatting tools in the toolbar. Adjust the font, size, and alignment to fit the purpose of your text box.
Tips & Guidelines for Using Text Boxes in Google Docs
1. Maintain Readability
Use high-contrast colors for text and background in your text boxes to ensure readability. Avoid overly decorative fonts in small text boxes to keep the text legible.
2. Use Text Boxes Sparingly
Text boxes should be used to highlight critical information or break up monotony. Overuse can clutter your document and detract from its professional appearance.
3. Align Text Boxes Consistently
Ensure all text boxes in your document align with one another unless intentionally styled otherwise. Consistent alignment aids in creating a clean, professional look.
4. Consider Mobile Viewers
Since Google Docs can be accessed on various devices, check how your text boxes appear on mobile to ensure they scale properly and remain readable.
5. Leverage Text Boxes for Visual Impact
Use text boxes not just for text but to hold images or a combination of both. This can help in creating dynamic, engaging layouts.
6. Keep Text Box Content Concise
Text boxes should contain concise and impactful text or information. Avoid filling them with too much text as this can overwhelm the reader.
7. Balance Text with Images
Integrate images and text within your text boxes for a balanced visual appeal. For instance, icons next to bullet points can emphasize your points more strongly.
8. Customize Borders and Backgrounds
Experiment with different border styles and background colors to make your text boxes stand out or blend in with your document, depending on their purpose.
9. Use Grids for Alignment
Use the gridlines in Google Docs to help align text boxes perfectly with other elements. This can be especially helpful when designing complex layouts.
10. Preview and Print
Always preview your document before sharing or printing to see how the text boxes appear in the final output. Adjust as necessary to ensure the highest quality.
Conclusion
While Google Docs does not have a built-in text box feature as found in some other word processors, you can effectively create similar functionalities using the Drawing tool or tables.
These methods allow for significant flexibility and creativity in document design, which will enhance your ability to communicate and engage through well-designed documents.


